Have you ever had trouble with your home security cameras and felt stuck? Well, you don’t have to anymore. DIY home camera repair is easy and fulfilling. With some simple techniques, you can fix common camera issues by yourself. This way, you save money and don’t need to call professionals every time.
By tackling home camera troubleshooting yourself, you’re keeping your home safe. Whether it’s a blurry image, a broken part, or just a battery swap, fixing these issues yourself is rewarding and saves money.
Let’s explore how you can easily solve your home camera problems. With the right knowledge, most fixes can be done quickly and effectively.
Introduction to DIY Home Camera Repair
Fixing your home camera yourself can make it last longer and work better. Learning how to keep your security cameras in good shape is key. This way, you get to keep an eye on your space and feel safe.
Importance of Maintaining Your Home Security System
It’s really important to keep your home security system working well. Regular maintenance, as shown in many guides, stops problems before they start. By checking your cameras often, you can fix issues early. This means they’ll work when you need them most.
Plus, knowing how your system works can save you money on repairs. It also makes your equipment last longer.
Common Issues with Home Cameras
Home cameras often face problems like connectivity issues, dirty lenses, and battery failures. Fixing these problems yourself can save you from calling a pro. Connection troubles might be from network issues, while dirty lenses can make the image blurry.
Make sure your camera’s batteries are charged or plugged in for clear surveillance.
| Issue | Description | Solution |
|---|---|---|
| Connectivity Issues | Camera losing connection to Wi-Fi or network. | Check the network settings and reduce interference. |
| Dirty Lenses | Debris or dirt obscuring the camera view. | Clean the lenses regularly with appropriate materials. |
| Battery Failure | Batteries are dead or not holding charge. | Replace or recharge the batteries as needed. |
Basic Tools Needed for Home Camera Repair
Starting a DIY home camera fix requires the right tools and materials. Having these essential tools makes the repair process smoother and more efficient.
Essential Tools and Materials
Here’s a list of must-have tools for any home camera repair project:
- Screwdrivers (Phillips and flathead)
- Lens cleaners and microfiber cloths
- Replacement batteries
- Precision tweezers
- Multimeter for electrical testing
These essential tools help you fix common issues like loose screws, dirty lenses, and battery replacements. They are key for keeping your home security system working well.
Where to Purchase Your DIY Tools
It’s important to know where to buy repair tools to save time and money. Hardware stores usually have what you need, but online retailers offer more choices and better prices.
| Source | Pro | Con |
|---|---|---|
| Local Hardware Stores | Immediate availability | Limited selection |
| Online Retailers | Wider selection, competitive prices | Shipping time |
For reliable and affordable tools, check out Home Depot and Amazon. They have a wide range of essential camera repair tools and materials. This will help keep your home security system in great shape.
Troubleshooting Home Security Cameras
Learning how to fix home security cameras is key for homeowners. It helps you spot problems like power issues, signal loss, and poor video quality. These problems can make your home less secure. Let’s look at ways to solve these issues.
First, check the power source. Make sure the camera is plugged in right and the outlet works:
- Look for any damage on the power cable.
- Make sure the power adapter fits your camera.
- Try another device in the outlet to see if it works.
If the power is okay, check the video quality next. Bad video can come from many things:
- Signal interference: Make sure nothing blocks the camera’s signal.
- Network issues: Check your Wi-Fi strength and internet connection.
- Camera lens: Clean the lens from dust and dirt.
Signal loss or connectivity problems are also common. Here’s how to fix them:
- Restart your router and camera.
- Update the camera’s firmware.
- Move the camera closer to the router or use Wi-Fi extenders.
Here’s a simple guide to troubleshooting:
| Problem | Potential Cause | Solution |
|---|---|---|
| No Power | Faulty Power Source | Check cables and outlets |
| Blurry Video | Dirty Lens | Clean the camera lens |
| Signal Loss | Interference or Weak Wi-Fi | Reboot devices, update firmware, relocate camera |
By following these steps, you can fix common problems with your home security cameras. Regular maintenance and quick fixes keep your security system strong.
Home Camera Maintenance Tips
Keeping your home cameras in good shape is crucial for clear footage. A regular maintenance routine can make your cameras last longer. Here are some tips to keep your security system working well.
Regular Cleaning and Inspection
Regular cleaning and checking your cameras is a must. Dust and dirt can hurt their performance. Here are some important steps:
- Establish a cleaning routine: Clean your cameras every month. Use a soft brush or air blower to get rid of dust from the lens and body. For the lenses, a microfiber cloth is best for cleaning.
- Check camera housings: Look for any cracks or wear on the camera housings. Water or moisture can harm the electronics inside.
- Ensure clear view: Make sure nothing blocks the camera’s view. Trim overgrown plants or remove debris that could block the lens.
- Test the camera functionality: Check each camera often to make sure it’s capturing clear footage. Make sure night vision works if it has it.
By following these tips, you can avoid many problems and have a reliable surveillance system. Regular cleaning and checks are essential for a well-working home security system.
How to Repair Home Camera
Fixing your home camera needs a step-by-step plan. First, figure out what’s wrong and then fix it. This guide will walk you through these steps.
Identifying the Problem
To start fixing your camera, you must diagnose the issue correctly. Make sure it’s plugged in and connected to the network. Look for any damage or loose connections. Also, check if the camera’s software or firmware is current.
Common symptoms to look for:
- Camera not powering on
- Video feed not displaying
- Irregular or unclear image quality
- Camera not responding to controls
Step-by-Step Repair Process
After finding the problem, here’s how to fix your camera:
- Power Cycle: Unplug the camera, wait a bit, and plug it back in to reset it.
- Check Connections: Make sure all cables are securely connected. Replace any damaged wires.
- Update Firmware: Download and install any updates from the manufacturer’s website.
- Inspect Hardware: Check the camera body and lens for any visible damage. If you find damage, contact the manufacturer for repair parts.
- Test Camera: After these steps, test the camera to see if the problem is fixed.
By following these steps, you can easily diagnose and repair your camera. This ensures your home security system works well.
Home Camera Lens Cleaning Techniques
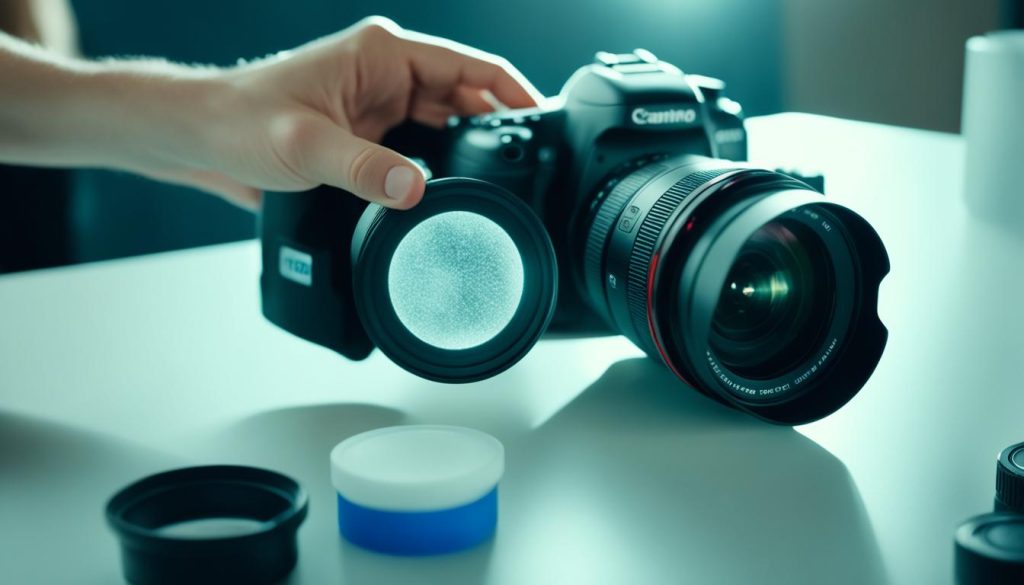
Keeping your home camera lens clean is key for its best performance. Proper care of your camera lens means clear footage and a longer-lasting device. We’ll cover the materials you need and steps for cleaning your lens effectively.
Materials for Cleaning
Choosing the right materials for cleaning your camera lens is vital to avoid damage. Here are the materials you should use:
- Lens Cleaning Solution: Use a solution made just for camera lenses.
- Microfiber Cloth: Great for wiping the lens without leaving marks.
- Lens Blower: Helps to remove dust without touching the lens.
- Lens Cleaning Pen: A tool with a brush and a cleaning tip on each end.
Proper Cleaning Methods
Using the right cleaning methods is just as important as choosing the right materials. Here are the steps for cleaning your lens well:
- Dust Removal: Start by blowing off any dust or debris from the lens.
- Application: Put a little lens cleaning solution on a microfiber cloth, not directly on the lens.
- Wipe Gently: Clean the lens with the cloth in circular motions to get rid of smudges and fingerprints.
- Detailing: Use a lens cleaning pen for tough spots or edges.
For regular care, clean your lens weekly. For a deeper clean, do it monthly or when your images start looking blurry.
| Material | Use |
|---|---|
| Lens Cleaning Solution | Removes smudges and fingerprints |
| Microfiber Cloth | Gently wipes the lens without damage |
| Lens Blower | Clears dust particles |
| Lens Cleaning Pen | Detailing and edge cleaning |
Replacing Home Camera Batteries
Keeping your home security system running well starts with regular maintenance. This includes replacing home camera batteries when they need it. Learning to change camera batteries yourself can save you time and money. It also keeps your security system working great.
First, check your camera’s user manual to find out what type of battery you need. Brands like Arlo, Ring, and Nest offer guides that explain battery compatibility and how to replace them.
- Make sure the camera is turned off to avoid electrical risks.
- Find the battery compartment, usually on the back or bottom of the camera.
- Open the compartment, take out the old batteries, and throw them away safely, following local rules.
- Put in the new batteries, making sure they’re in the right position as the manual shows.
- Close the battery area and turn on the camera to make sure it works right.
Choosing the right batteries is key for your camera’s performance. Here’s a look at some popular battery options:
| Battery Type | Specification | Usage Duration | Compatibility |
|---|---|---|---|
| CR123A | 3V Lithium | 1-2 years | Arlo, Ring |
| 18650 | Rechargeable Lithium-Ion | 6 months – 1 year | Nest, Blink |
| AA | 1.5V Alkaline | 3-6 months | Various older models |
Follow these steps for replacing your camera batteries to keep your home secure and efficient. Doing it yourself is easy and keeps your cameras working well all the time.
Resetting Home Camera Software
Resetting your home camera’s software is key when you face technical issues. These issues might include connectivity problems, software bugs, or cameras that won’t respond. Resetting the software often fixes these problems and keeps your home security system working well.
When to Reset Your Camera
Knowing when to reset your camera is vital for keeping your home security system running smoothly:
- Your camera stops responding or seems offline often.
- Software updates don’t install right.
- You keep having network connection issues.
- The camera settings don’t work as they should.
Step-by-Step Reset Guide
Here’s a simple guide to reset your home camera software:
- Find the reset button on your camera. Check the user’s manual if you’re unsure.
- Press and hold the reset button for 10-15 seconds.
- Let go of the button when the camera’s light starts blinking.
- Wait for the camera to restart and go back to its default settings.
- Then, set up your camera again as you like.
Resetting your camera not only fixes problems but also gets it ready for the future. Always follow this step-by-step camera reset guide when you have ongoing issues. This ensures your security and monitoring stay smooth.
Home Camera Wiring Repair
Fixing your home security system often means dealing with wiring problems. Knowing the common wiring issues and having the right tools can make fixing camera wiring easier.
Common Wiring Issues
There are several common issues with home camera wiring. These problems can affect how well your security system works:
- Loose Connections: Over time, connections can loosen, leading to intermittent or complete loss of power to the camera.
- Frayed or Damaged Wires: Exposure to the elements or general wear and tear can cause wires to become frayed or damaged, compromising their effectiveness.
- Interference: Electrical interference from other devices can disrupt the signal, causing your camera to malfunction.
Tools Needed for Wiring Repair
Having the right tools is key for a successful home camera wiring repair. Here is a list of essential tools you may need:
- Wire Strippers: These are used to strip the insulation from the ends of the wires.
- Multimeter: A multimeter helps you check the continuity and voltage of the wires, ensuring they are functioning correctly.
- Screwdrivers: Different screwdrivers will be necessary for loosening and tightening the connections.
- Electrical Tape: This is used to insulate wire connections and prevent shorts.
- Connectors: Wire connectors make the joining of wires secure and reliable.
When fixing camera wiring, always remember to prioritize safety. Turn off the power supply before working on any wiring to avoid electric shock. If the repair seems too complex, it’s best to get help from a professional electrician.
Home Camera Mounting Solutions
When looking at home camera mounting solutions, it’s key to make sure cameras are secure and in the best spots. This boosts your security setup’s effectiveness. Experts in security and home decor share camera placement tips to help you get great results.
Start by picking key spots for installing security cameras. These spots are usually entry points like doors, common areas inside, and windows.
Here are some camera placement tips:
- Height and Angle: Place cameras high up to prevent tampering but angle them to capture clear footage of anyone approaching.
- Lighting: Make sure cameras aren’t pointed at light sources to avoid glare and video washout.
- Distance and Focus: Adjust the camera lens for clear focus on important areas without losing detail.
For installing security cameras, the surface matters:
- Wood: Use standard screws and mounts for a secure attachment.
- Brick or Concrete: Use wall anchors and masonry screws for a strong mount.
- Vinyl Siding: Consider using siding clips or hooks to avoid exterior damage.
Adding style to your home camera mounting solutions can also improve your home:
- Hide cameras with decorative elements for a less noticeable look.
- Use wire concealers to keep cables hidden and your space tidy.
- Integrate smart lighting to boost visibility and upgrade your home’s tech look.
Looking at different mounting options can help you pick the best for your home:
| Solution | Pros | Cons |
|---|---|---|
| Wall Mount | Sturdy, Tamper-resistant | Requires drilling, Permanent |
| Ceiling Mount | Wider Coverage, Out of reach | Complex installation, Higher cost |
| Flexible Mount | Adjustable, Easy to install | Less secure, Usually visible |
By using these home camera mounting solutions and camera placement tips, you can set up a strong and good-looking security system. This will make your home safer.
Preventive Measures to Keep Your Home Camera Safe
To keep your home camera safe and working well, it’s key to secure and weatherproof it. These steps not only make the device last longer but also protect it from damage or theft.
Securing the Camera Mount
It’s important to secure the camera mount to stop theft and keep it stable. Start with strong brackets and screws to attach the camera to a sturdy surface. For extra safety, use anti-theft mounting gear like tamper-proof screws.
Also, place the camera high up where it’s hard to reach. This can greatly lower the chance of someone messing with it.
Protecting Against Weather Conditions
It’s vital to weatherproof your camera if it’s outside. Choose cameras made for outdoor use because they’re built to withstand the elements. Adding a silicone cover or weatherproof box gives extra protection.
Make sure all cables are sealed well to keep moisture out. This helps avoid problems that could make the camera unsafe or stop it from working right. Check and maintain the camera’s outer casing often to keep it weatherproof all year.
Conclusion
This guide on DIY home camera repair has shown how key it is to keep your home security system running well. You’ve learned how to fix common problems with basic tools and specific repair steps. This knowledge helps make sure your security cameras work great.
You’ve discovered how to clean the camera lens, replace batteries, and fix wiring issues. Taking steps to prevent problems and knowing how to fix them can make your security system last longer. Resetting the camera software and finding mounting solutions are also important for keeping your surveillance system efficient and reliable.
Experts say having DIY skills in home security can save time and money. It also gives you confidence in handling your system. By doing these repairs and maintenance, you keep your home safe with little downtime. Being proactive with home camera repair stops small issues from turning into big ones, keeping your home secure.
